CLEAN INSTALL // ROLLING BACK TO STOCK#
> INITIATING ROLLBACK SEQUENCE...> TARGET STATE: PRE-MODDED / VANILLA
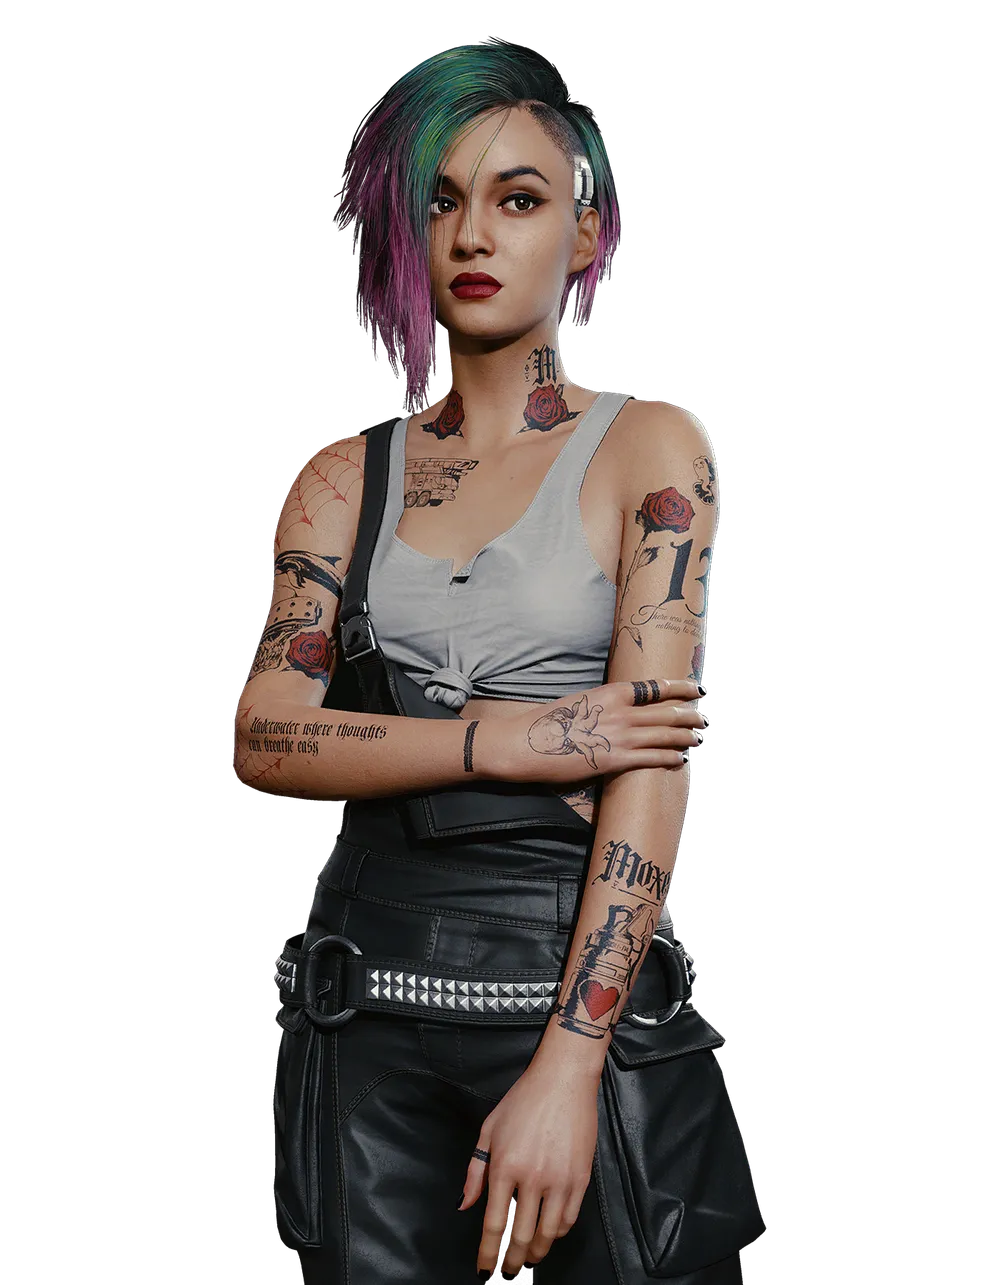
Hey, choom. Judy here, figured someone should walk you through this instead of leaving you to untangle it yourself.
A clean install just means stripping your game back down to stock, no mods, no leftover junk in the way, using the Mod Remover tool. Think of it like wiping a 'deck before you jack back in, sometimes you need bare metal to tell if the problem's the collection, or the game itself throwing a tantrum. We don't need no shoddy virtu enviros spoiling your fun now do we.
"Your synapses will sizzle like locusts in a deep fryer." — Judy Alvarez
Who this is for
Anyone who hit an install problem they can't shake, wants to update the game before the collection supports the new patch, or just wants to uninstall everything and start fresh.
We do not support Pirated copies
We do not support, endorse or recommend you mod Cyberpunk with a pirated copy of the game, Please make sure you have a legitimate copy of the game aquired through Steam/GOG/Epic Game, we will not offer to support to those who are running non-legit copies of the game.
Before you start#
- I've backed up any save files I want to keep (a clean install doesn't touch saves, but it's good practice before touching game files)
- I've noted which personal mods I have installed outside the collection — they'll show as "uninstalled" in Vortex afterward and need re-adding by hand
Tip
If you only want to remove one mod rather than the whole collection, check Common Problems first — a full clean install is the last resort, not the first troubleshooting step.
Step-by-step removal#
Tick a step off once you've finished it — your progress is saved in this browser, so it's still here if you close the tab and come back later.
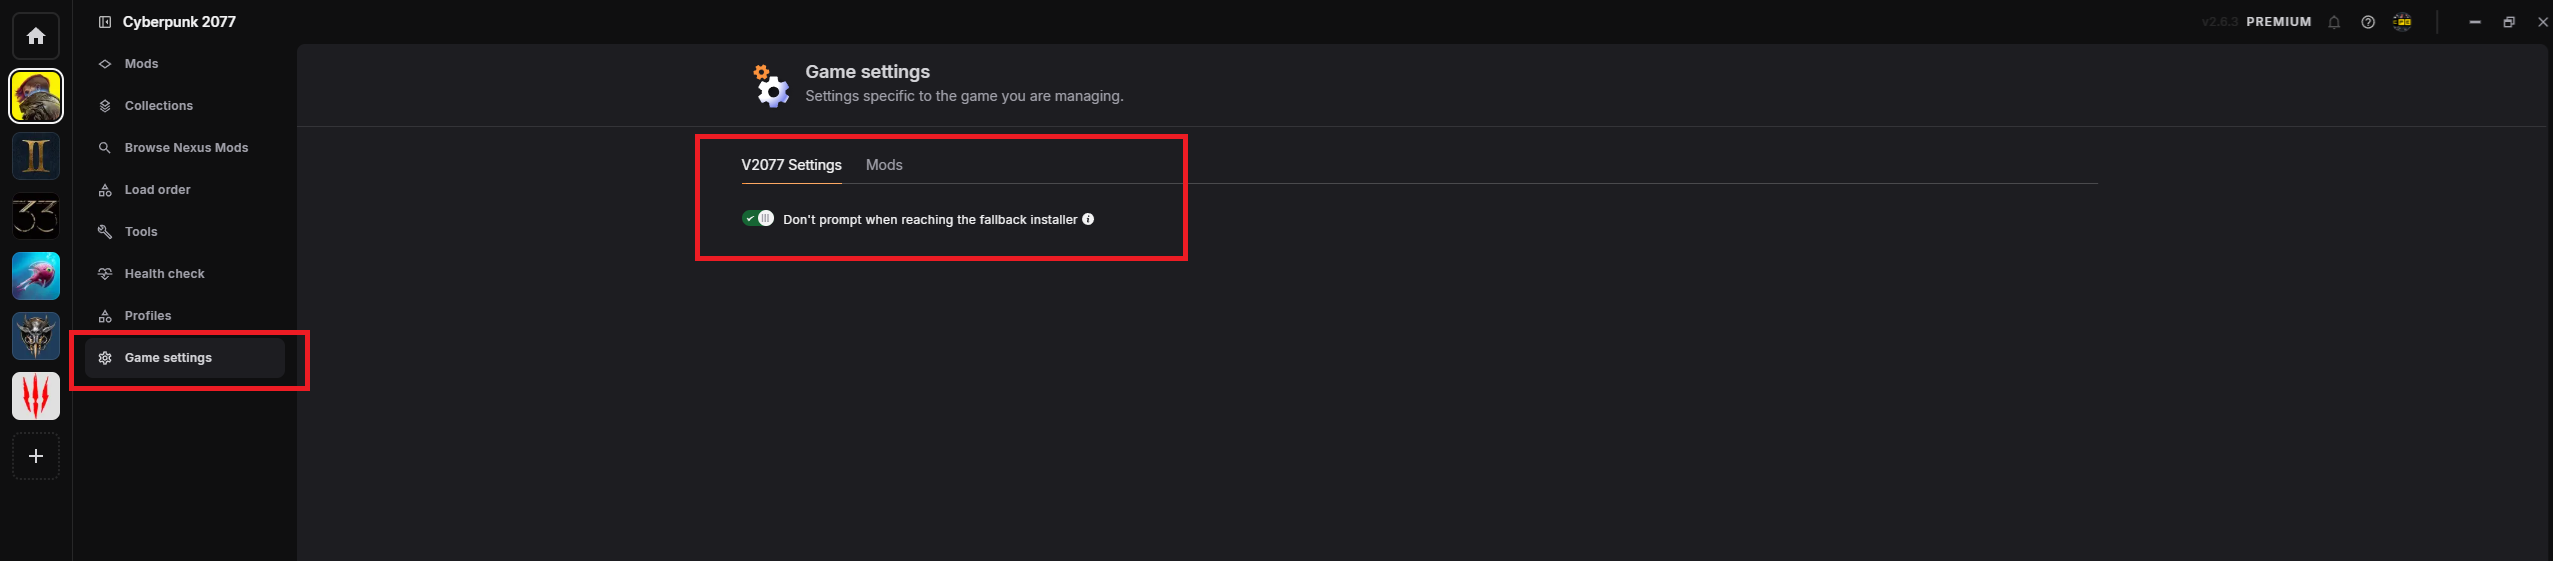
Step 1: Double check V2077 settings
Before getting started, double check you have the correct V2077 settings inside of Vortex.
Make sure "Don't prompt when reaching fallback installer" is ON.
- Confirmed "Don't prompt when reaching fallback installer" is ON
📷 Show me
Step 2: Remove all mods
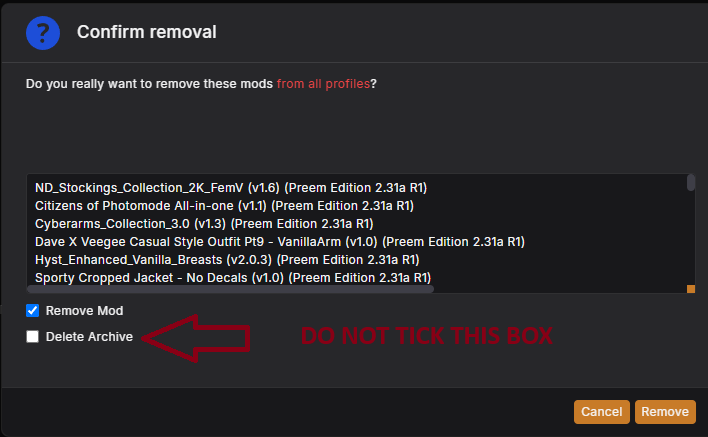
- Open up Vortex, and under Mods select all the mods (
Ctrl+A). - At the bottom of Vortex select Remove, then check Remove mod from the popup menu — don't select "Delete Archive".
If Ctrl+A doesn't work: select the top mod, scroll to the bottom, hold Ctrl and select the last mod — this will highlight them all.
This will remove mods linked to Vortex and leave Vortex clean. You may have to do this multiple times if you still see mods in Vortex — these will likely be older versions left over from previous revisions.
Personal mods
For any personal mods you have installed, make a note of which ones you have, as you'll have to re-install them once you've re-added the collection (they'll appear as "uninstalled" in Vortex).
- All mods removed from Vortex (repeated if any leftovers remained)
📷 Show me
Read before Step 3
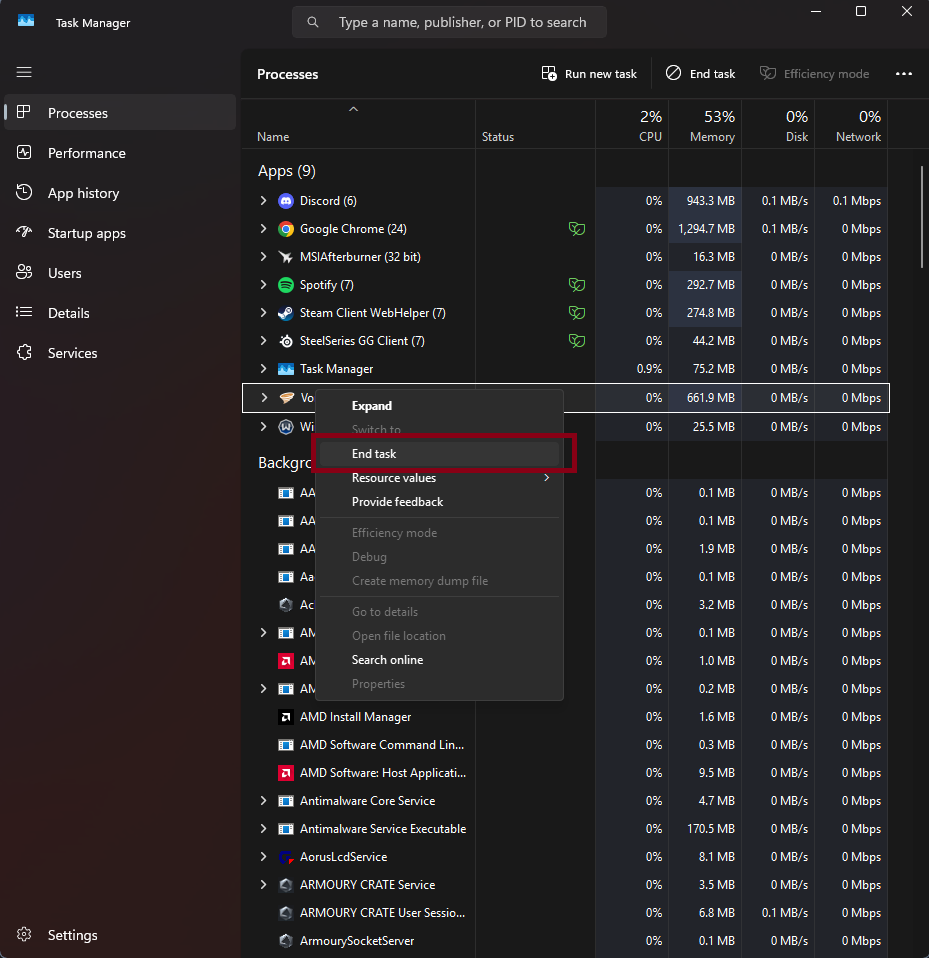
Once you've removed all mods in Vortex, you must force close Vortex. Vortex must not be open or running while you run Mod Remover, or this will throw errors later down the line.
Vortex must be closed/not running once this step is complete.
📷 Show me
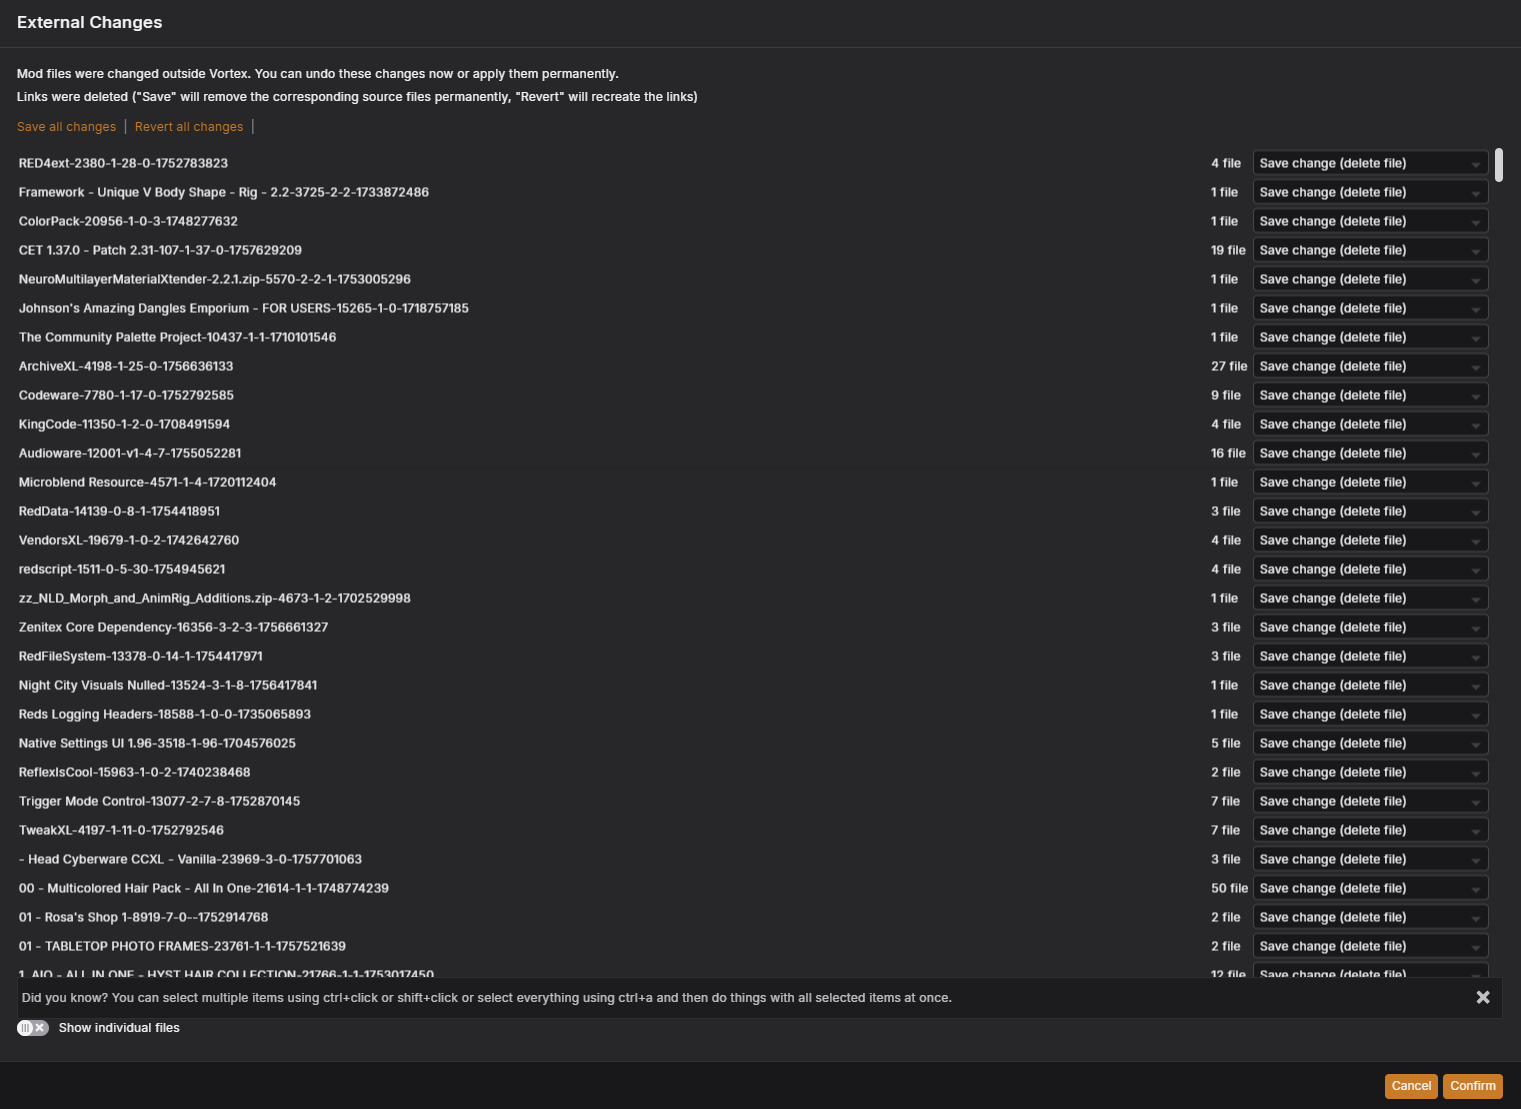
Getting an error message about external changes?
You didn't force close Vortex properly before running Mod Remover. Revert the changes it's warning you about, close Vortex fully this time, and run Mod Remover again.
📷 Show me
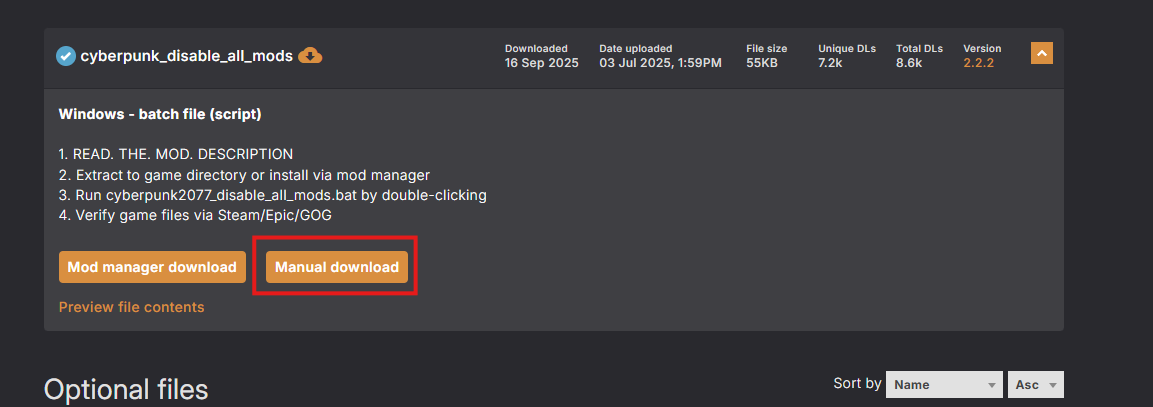
Step 3: Download Mod Remover
Head over to Nexus and download Mod Remover.
- Downloaded Mod Remover
📷 Show me
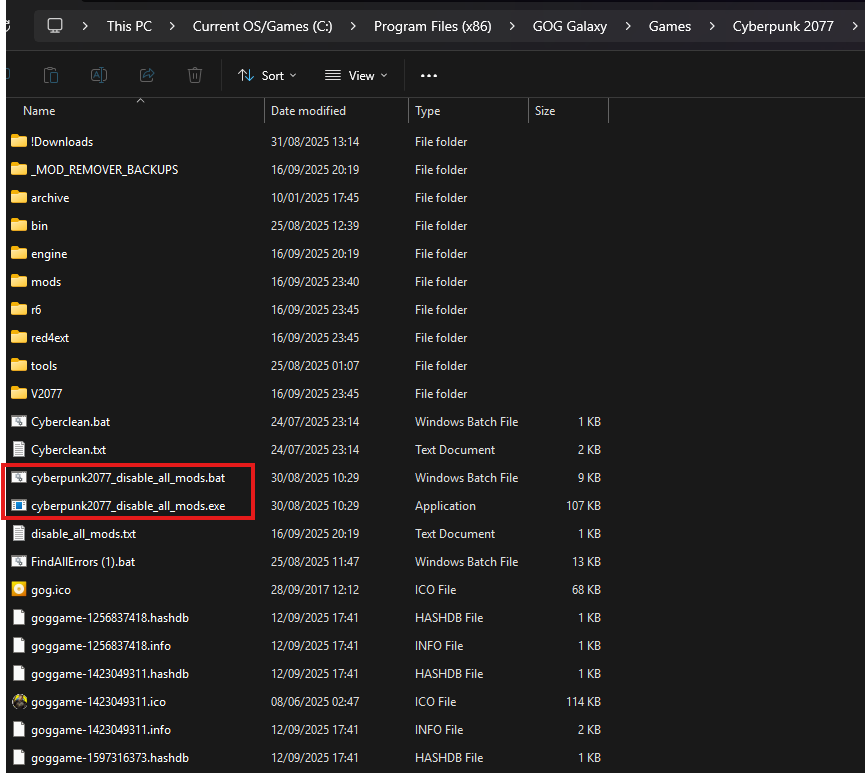
Step 4: Stick Mod Remover in root
Extract the contents of Mod Remover into your game's root directory, and run either the .exe or .bat.
- Mod Remover extracted into the game's root directory
📷 Show me
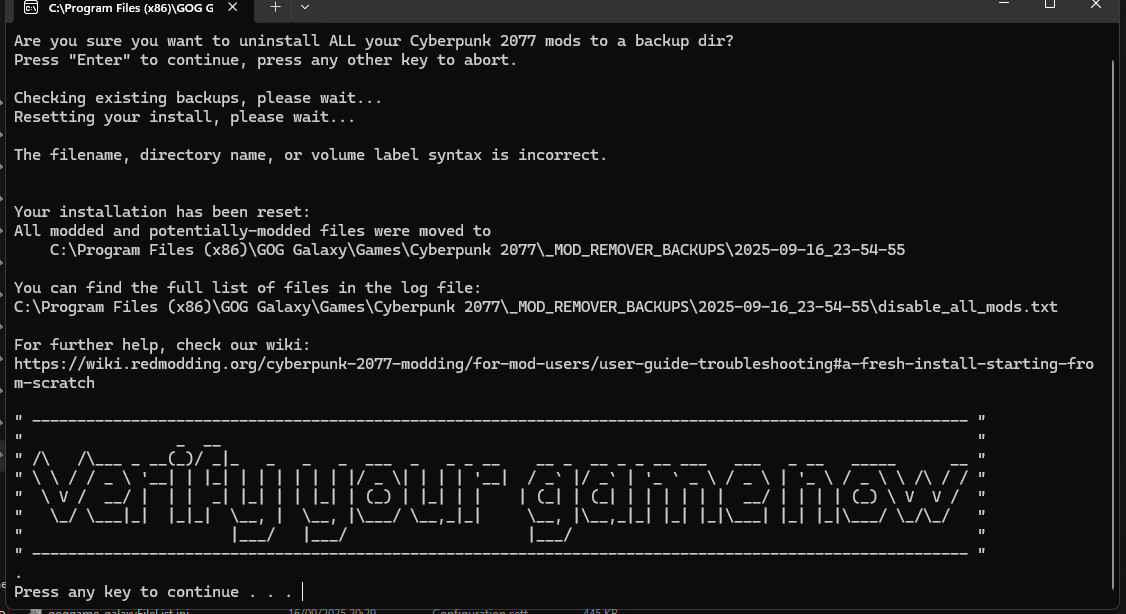
Step 5: Run the program
Now run the program — you'll be prompted to press Enter to create a backup. It will then begin removing all modded files from your directory, leaving a clean install.
Once it's done, you'll see a screen showing the locations of the backups (in case you need to re-add them later), and a prompt to verify your game files.
- Ran Mod Remover and let it finish
📷 Show me
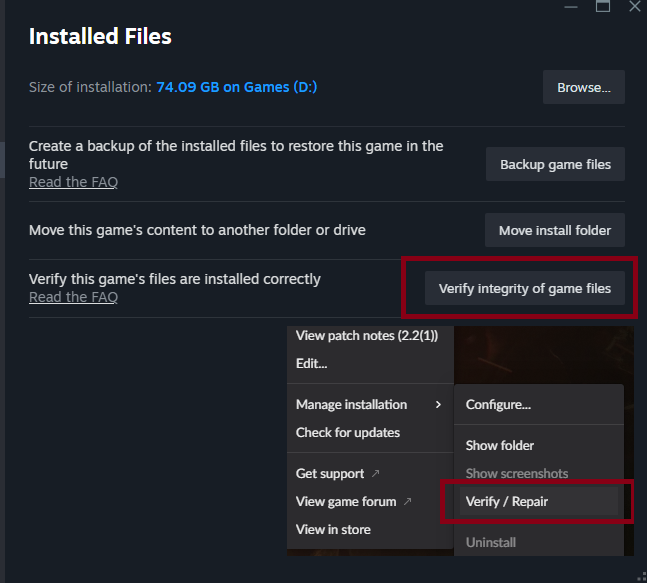
Step 6: Verify game files
Once the program is done and asks you to verify game files, go into Steam/GOG and verify/repair your game files.
- Platform verification completed with no unresolved errors
📷 Show me
Step 7: Done — some final checks
Congratulations, you should now have a clean Cyberpunk installation.
Do not open Vortex yet
First confirm your game boots in a vanilla state, using your default launcher (Steam/GOG) — not Vortex.
Once you've confirmed it boots vanilla, re-add the collection from our Nexus page back into Vortex under a new profile (don't reuse your old profile). This should fix most issues you may experience, from mods installed incorrectly to auto convert accidentally being on during install.
- Game boots vanilla via Steam/GOG
- Collection re-added under a new Vortex profile
You're back to stock
That's it — you're on a clean, vanilla install. From here you can update the game safely, or head back to Installation whenever you're ready to mod it again.
Still seeing mod content or errors after this?
Something didn't get removed, or Vortex wasn't fully closed during Step 2. Double-check that step, then re-run Mod Remover. If it persists, ask in the Preem Team Discord or check Troubleshooting.